
How to add live chat to your Parse-powered app with Hipmob
TL;DR: Hipmob allows you to add live support chat and user chat to your Android or iOS mobile app in less than 15 minutes, while Parse provides a powerful backend-as-a-service for your mobile app. In this article we add Hipmob to a simple Parse app, and using the Parse object identifiers we tie the Hipmob connection to the Parse user. We can then leverage Parse's targeted push notifications to ping the mobile app whenever the mobile user is sent a chat message on the Hipmob platform.
Hipmob provides an SDK for real-time communication that can be used to provide live support to your users (via chat) or to build user-to-user chat or group chat into your mobile or web app; it's as simple as downloading our libraries (for iOS, Android and the web), integrating them into your apps with an app key we provide and then your app has real-time communications (so you can talk to users or they can talk to each other). No server setup or code to write, just real time communication that scales with you.
Backend-as-a-Service providers are becoming more and more powerful: Parse is very popular, as well as a fellow YC company, and with support for both user authentication and push notifications it seemed like a natural fit for integration. Tens of thousands of apps leverage Parse's services: being able to instantly add chat to all of those apps seemed like a great idea. A couple of hours later, here we are!
Mission
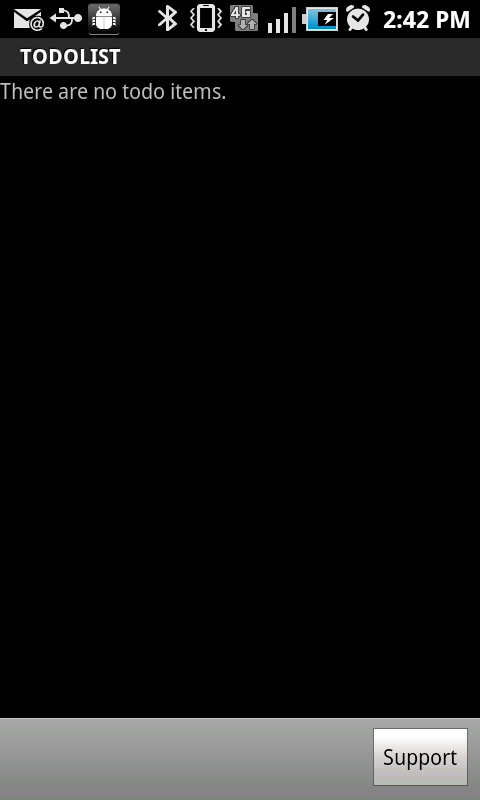
Take a simple Android app using the Parse platform (in this case, the simple todo list app provided by Parse) and:
- Add Hipmob support chat.
- Connect the Hipmob connection to the Parse User.
- Add support for Parse push notifications to the app.
- Configure the Hipmob management interface to send push notifications to the app.
After that we should be able to send a message to the app's user and receive Parse push notifications in the app.
All the code shown here is available on Github: check it out at https://github.com/Hipmob/hipmob-parse-android. If you just want to see the end result you can clone that repo, copy your Parse application ID and client key into the com.hipmob.parse.demo.ToDoListApplication class, copy your Hipmob application id into com.hipmob.parse.demo.ToDoListActivity, and then build it. You'll need to set the Parse application ID and REST API key in the Hipmob management interface so we can send push notifications (see the Hipmob Parse docs for how) and you'll be good to go. The full documentation on Hipmob's Parse integration can be found here.
Setup
There's a bit of prep work before we can start.
- If you haven't already done so, sign up for a free account at http://manage.hipmob.com with your name and email address. Once you're signed up an app will be automatically created for you. If you already have an account you can just use an existing app (or create a new one).
- Download the latest Hipmob android library.
- If you don't already have a Parse account, sign up for free at https://parse.com, then create a new Parse app.
- Download the Parse todo list sample Android app, then open it up in Eclipse.
And then we're ready to start.
Add Hipmob support chat
In Eclipse, we add the Hipmob library to the libs folder: depending on your version of Eclipse and the Android tools, you might need to add it to the build path manually, but more recent versions take care of that for you.

Add the HipmobCore Activity to the AndroidManifest.xml file so we can fire up the Hipmob chat activity: you can add it just before the closing </application> tag.
       <activity android:name="com.hipmob.android.HipmobCore" />
    </application>
Modify the res\layout\main.xml layout file so we have a button to launch the support chat.
<?xml version="1.0" encoding="utf-8"?>
<RelativeLayout xmlns:android="http://schemas.android.com/apk/res/android"
    android:layout_width="fill_parent"
    android:layout_height="fill_parent" >

    <LinearLayout
        android:id="@+id/buttonbar1"
        style="@style/ButtonBar"
        android:layout_width="fill_parent"
        android:layout_height="wrap_content"
        android:layout_alignParentBottom="true"
        android:gravity="right" >

        <Button
            android:id="@+id/support"
            android:layout_width="wrap_content"
            android:layout_height="wrap_content"
            android:text="@string/button_support" >
        </Button>
    </LinearLayout>

    <LinearLayout
        android:layout_width="fill_parent"
        android:layout_height="fill_parent"
        android:layout_above="@+id/buttonbar1"
        android:layout_alignParentTop="true" >

        <ListView
            android:id="@+id/android:list"
            android:layout_width="wrap_content"
            android:layout_height="wrap_content" />

        <TextView
            android:id="@+id/android:empty"
            android:layout_width="wrap_content"
            android:layout_height="wrap_content"
            android:text="@string/empty" />
    </LinearLayout>

</RelativeLayout>
which gives us a simple Support button.
Create variables to store the support button and the Hipmob application id (taken from the Hipmob management interface during setup) in the ToDoListActivity class (make sure you use a valid application id!).
private Button support;
private static final String HIPMOB_KEY = "12345678901234567896948390494558";
In the onCreate callback fetch the button.
support = (Button)findViewById(R.id.support);
support.setOnClickListener(this);
And then add the click listener that will launch the support chat.
@Override
    public void onClick(View v)
    {
        // create an intent
        Intent i = new Intent(this, com.hipmob.android.HipmobCore.class);

        // REQUIRED: set the appid to the key you're provided
        i.putExtra(HipmobCore.KEY_APPID, HIPMOB_KEY);

        // launch the chat window
        startActivity(i);
    }
And that is the basics we'll need: we can now launch a support chat client when we push the Support button.
Connect the Hipmob connection to the Parse User.
We use Parse's targeted push notifications: this lets us send a push notification using Parse's REST API and specify a Parse query as the target. Here we'll add code to setup the Parse installation and pass the Parse user id to Hipmob.
The ToDoListActivity uses an AsyncTask to connect with Parse: we leverage this to setup the ParseInstallation with the information we'll need for the Parse push query. Add the following code to the beginning of the doInBackground method: this ensures that a Parse User has been created and saved on the Parse backend, adds the user's object ID to the ParseInstallation as a key we can query against and then makes sure the updates to the ParseInstallation are also saved to the Parse backend.
// make sure we have an installation
getApplication();
ParseInstallation pi = ParseInstallation.getCurrentInstallation();
String id = pi.getString("hipmobId");
if(id == null){
      String uid = ParseUser.getCurrentUser().getObjectId();
      try{
        if(uid == null) ParseUser.getCurrentUser().save();
        pi.put("hipmobId", ParseUser.getCurrentUser().getObjectId());
        pi.save();
      }catch(Exception e1){
    android.util.Log.v("ToDoListActivity",
    "Exception saving installation id ["+e1.getMessage()+"]", e1);
      }
}
We'll use the hipmobId as the key for the Parse push query. We just need to pass it off as the Hipmob application identifier by modifying the onClick method.
@Override
public void onClick(View v)
{
    // create an intent
    Intent i = new Intent(this, com.hipmob.android.HipmobCore.class);

    // REQUIRED: set the appid to the key you're provided
    i.putExtra(HipmobCore.KEY_APPID, HIPMOB_KEY);

    // Use the parse user id
    i.putExtra(HipmobCore.KEY_DEVICEID,
               ParseInstallation.getCurrentInstallation().getString("hipmobId"));

    // launch the chat window
    startActivity(i);
}
And now the next time the user opens the chat window we'll get the hipmobId sent to us!
Add support for Parse push notifications to the app.
Parse uses a custom push notification system on Android (NOT Google Cloud Messaging): to configure it we just need to add the Service and Receiver to the AndroidManifest.xml file and then register for push notifications.
First the manifest changes: once again add these lines just before the closing </application> tag.
<service android:name="com.parse.PushService" />
<receiver android:name="com.parse.ParseBroadcastReceiver" >
   <intent-filter>
      <action android:name="android.intent.action.BOOT_COMPLETED" />
      <action android:name="android.intent.action.USER_PRESENT" />
   </intent-filter>
</receiver>
Then, the push notification subscription: add this to the end of the onCreate callback in the ToDoListActivity class.
// subscribe for push
PushService.setDefaultPushCallback(this,
                              com.hipmob.parse.demo.ToDoListActivity.class);
PushService.subscribe(this,
                      "", com.hipmob.parse.demo.ToDoListActivity.class);
Notice we set a default push callback Activity class: Parse's Android push integration allows custom classes to be specified, but for this simple app we just use the default. We also subscribe to the broadcast channel.
We're now set to receive push notifications: next we need to configure Hipmob to send push notifications.
Configure the Hipmob management interface to send push notifications to the app.
The next set of steps are taken from our Parse integration documentation at https://www.hipmob.com/documentation/integrations/parse.html.
Log into your Hipmob account at https://manage.hipmob.com/#apps:

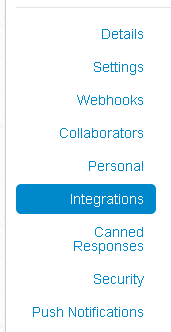
Once there, click the Settings button next to the app you'd like to update.

Select the Integration settings pane.
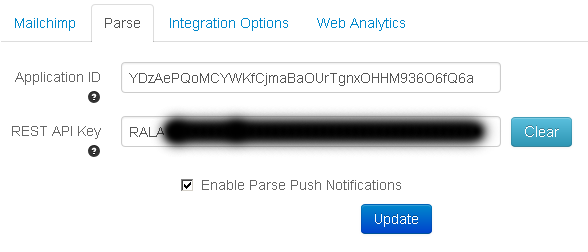
Select the Parse tab, which will show you options to enter the Parse application ID and REST API key, as well as to enable/disable Parse push notifications. Enter your application ID and REST API key as shown below, and enable Parse push notifications.
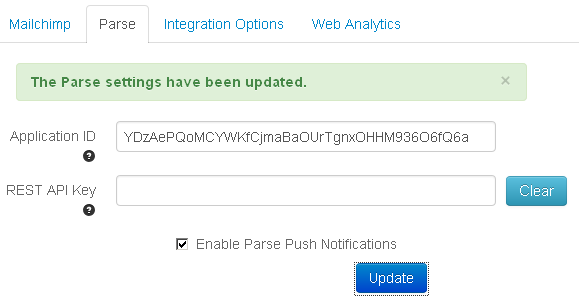
And, you're done.
With this enabled, every time a message is received for a device that is offline we will make a Parse REST API call with a JSON body that looks like this:
var body = {
    "where": {
        "hipmobId": '{hipmobId}'
    },
    "data": {
        "alert": '{message}',
        "count": '{count},
        "action": "com.hipmob.push.NEW_MESSAGE"
    }
};
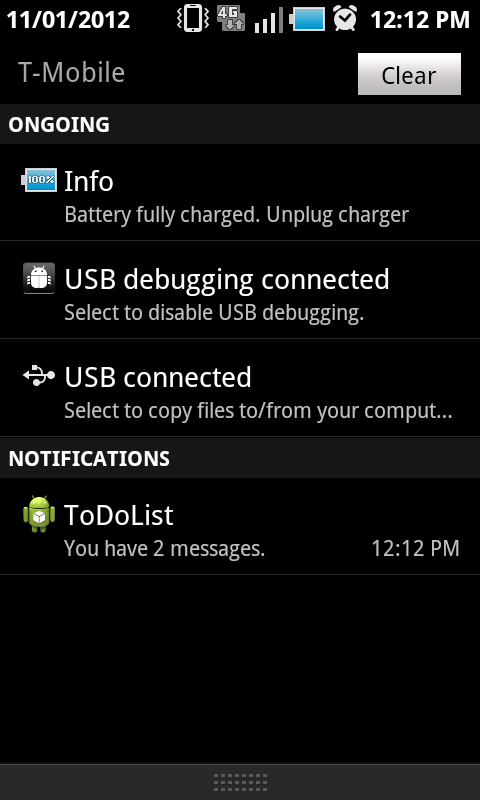
This will send a push message with a simple text message (also configurable in the Hipmob management interface), a count of the number of available messages and a custom action (that can be used by the Parse push notification receiver) to all devices that use the hipmobId we configured on the device.
Send a message!
You will need to open the chat window at least once to send the hipmobId to the Hipmob communication network. Once that is done you can then send a message to the device. Log into the Hipmob management interface and visit the Devices tab (at https://manage.hipmob.com/#devices).

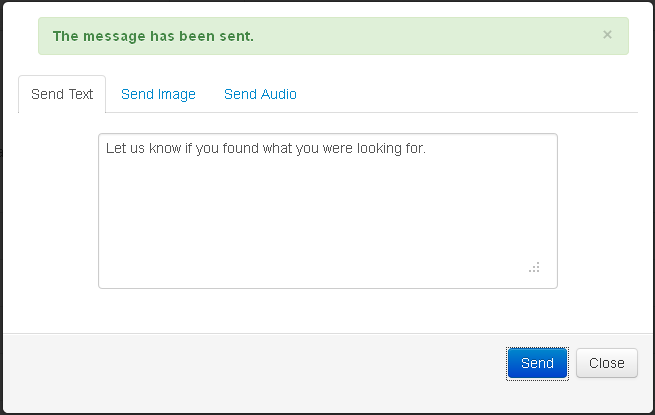
Find the device you want to send a message to, and then expand the device's menu and select Send Message.

Type in the message text, and then click Send.
As a bonus, because we use the Parse User object ID the push message will be delivered to ALL instances of the application that the user is logged into!
And we can see it on the device.
That's all folks
And that's it. There are many other things you can do with Hipmob: see our full list of docs at https://www.hipmob.com/documentation, including our user-to-user chat. There are also a couple of other neat things we can do with Parse: they'll be the subject of upcoming articles.
Let us know your thoughts: if you have any questions, suggestions or comments email/call/chat with us!
UPDATE: comments and discussion on Hacker News.
P.S. If you're building a mobile app and want first-class, integrated, in-app support chat or user-to-user chat you should check out Hipmob!
The full documentation on Hipmob's Parse integration: View the documentation